Quota Setup
Step-by-step guide for opening the quota dialog, configuring axes, editing cells, and setting buffer rates.
This page walks through setting cell-level targets using the quota management dialog. If you're new to quotas, start with Quota Overview first.
Opening the quota dialog
- From the top-right menu of the project screen, select Quota Management
- The quota dialog appears
- If no quota exists yet, click Create New to start
Axis configuration (1 / 2 / 3 axes)
You can configure up to three quota axes. More axes multiply the number of cells, so plan carefully — make sure the total is realistic for your target sample size.
| Axes | Example |
|---|---|
| 1 axis | Gender |
| 2 axes | Gender × Age |
| 3 axes | Gender × Age × Region |
Selecting quota questions
Pick a question for each axis. Only SCREEN(SA) questions are eligible.
- A SCREEN(SA) question asking gender
- A SCREEN(SA) question asking age group
- A SCREEN(SA) question asking region
Options marked as screen-out are automatically excluded from the quota matrix.
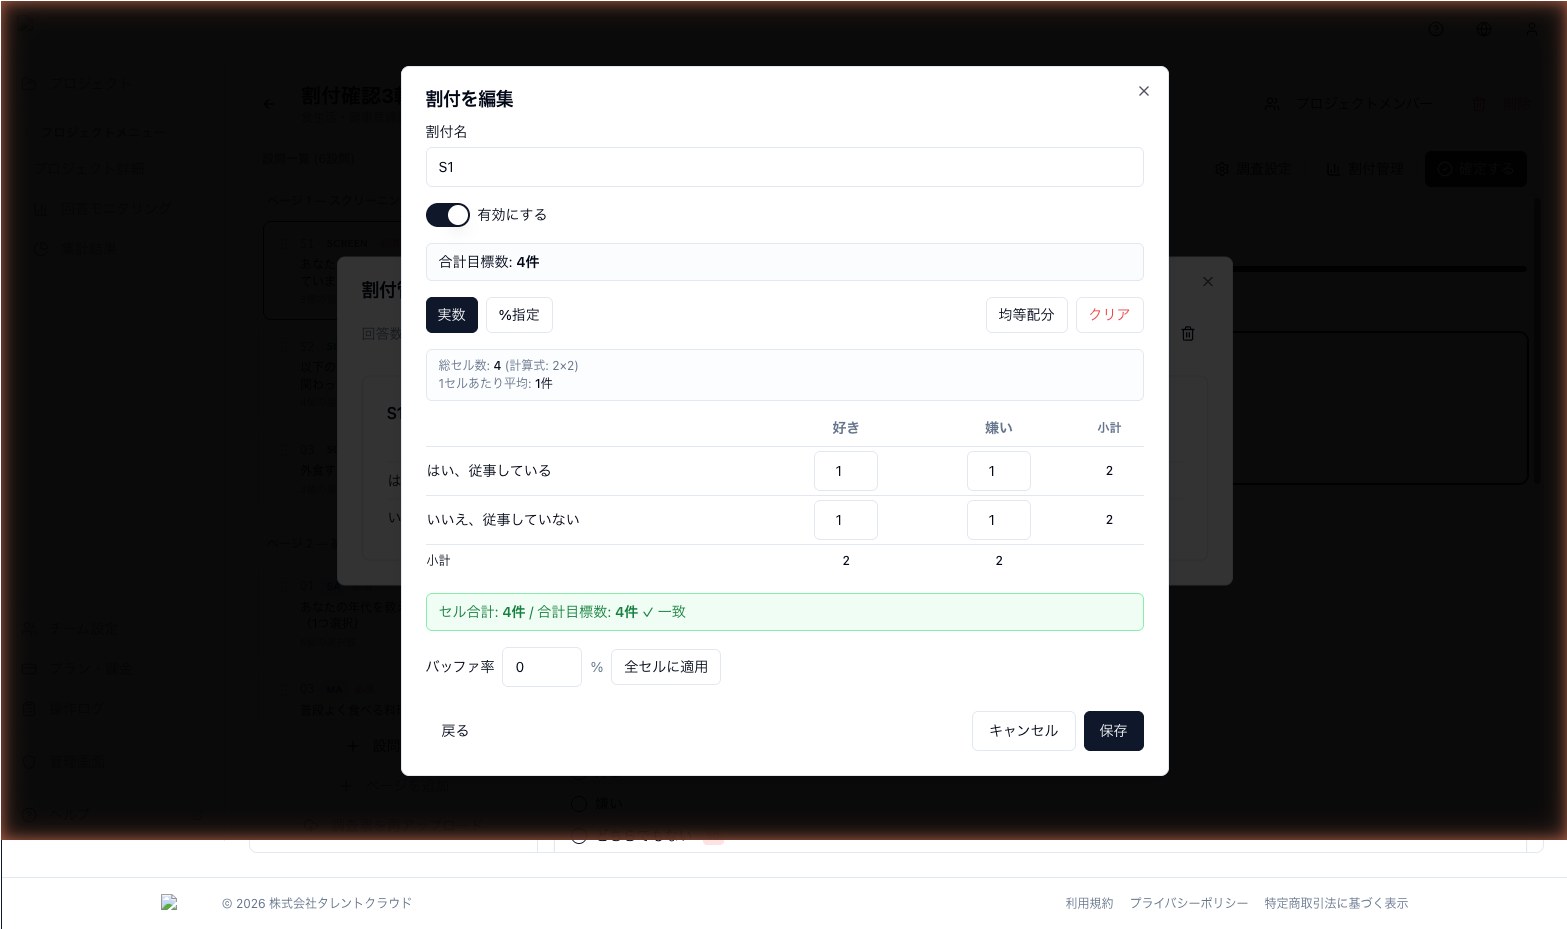
Editing cells
Enter a target into each cell of the matrix:
- Toggle Number ⇔ Percentage to switch input modes
- Click Distribute Evenly to split the total target equally across all cells
- Click Clear to reset all cells to zero
- Buffer rate can be set per cell, or applied uniformly via the Bulk Set button
Consistency checks
- The dialog automatically verifies that the sum of cell targets matches the total target
- If there is a mismatch, a warning appears with guidance on how to adjust
- The cell summary at the bottom always shows total cell count, current sum, and the delta against the target
Next step
Once your quota is configured, head to Quota Monitoring to track real-time collection.